Contributing
Prerequisites
- GPU capable PC
- A supported OS
- Windows 10
- MacOSX
- Linux (with appimage support)
Clone this repo
git clone https://github.com/RustyRaptor/SolvAR.git
Installing Unity and setup the editor
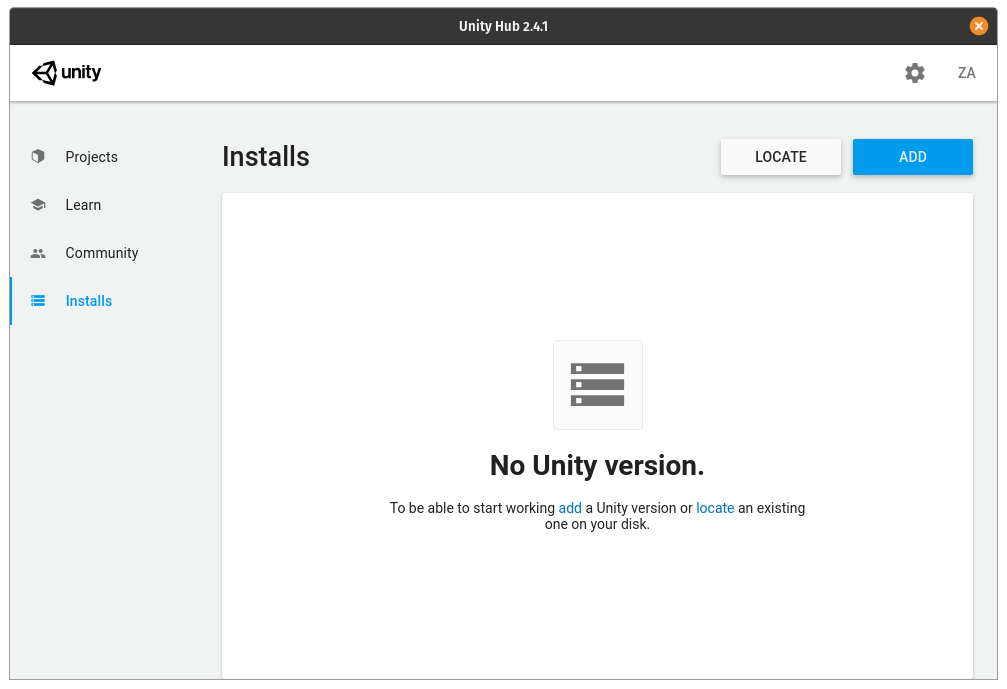
Install Unity Hub
- Download Unity Hub for your OS
- https://unity3d.com/get-unity/download
- Run the installer and launch Unity Hub
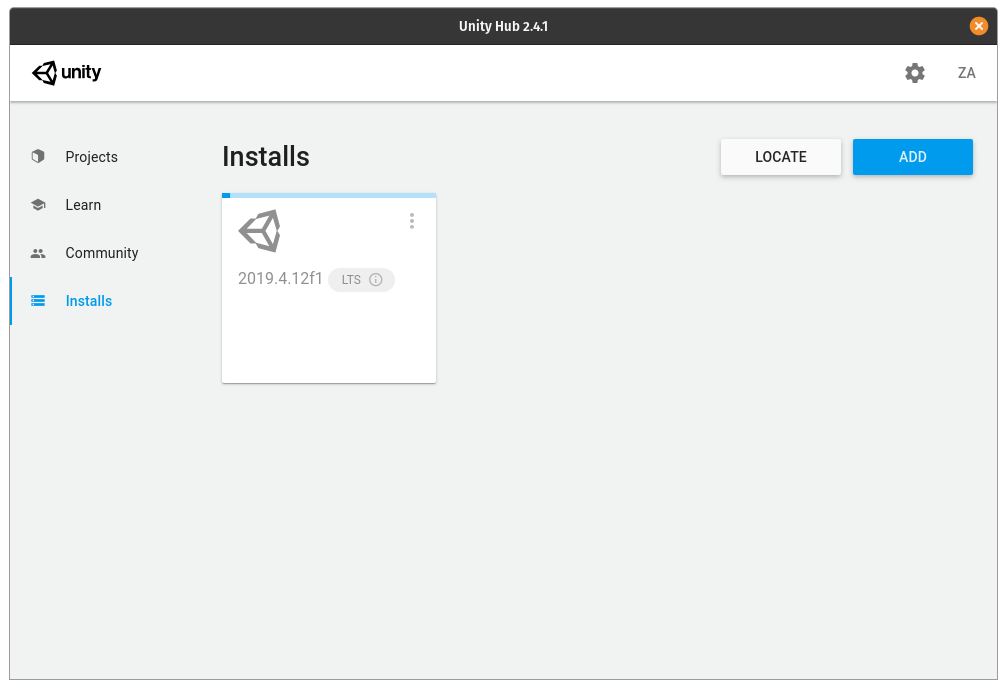
Install the correct version of unity and the modules
- Go to Installs
- Click add
- Select the recommended LTS version of unity 2019.4
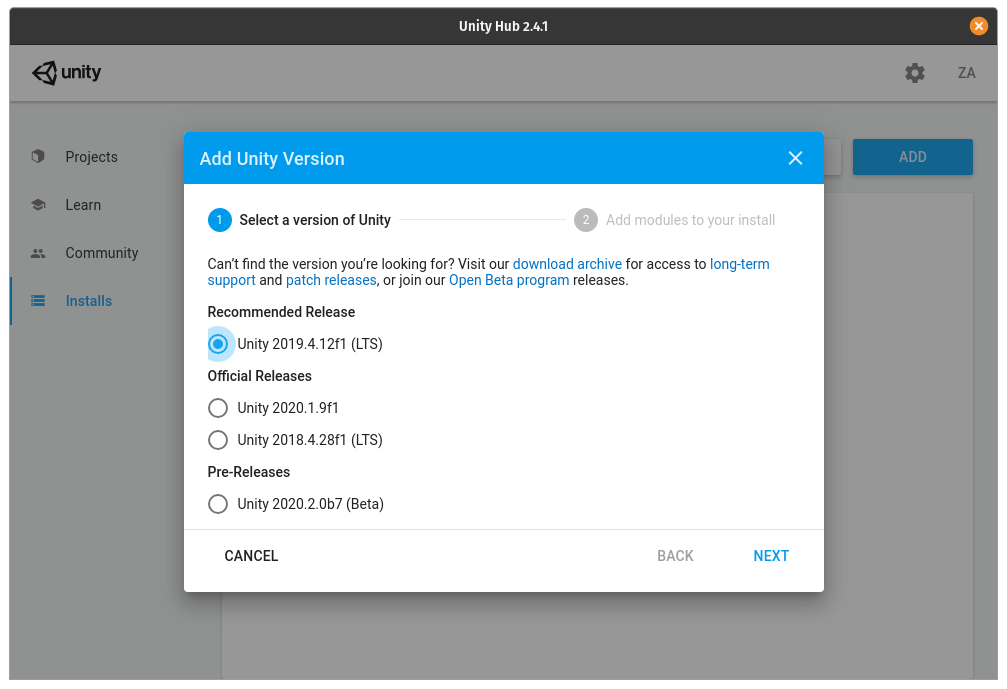
- Click next
- Select the required modules
- Android Build support
- Android SDK and NDK Tools
- OpenJDK
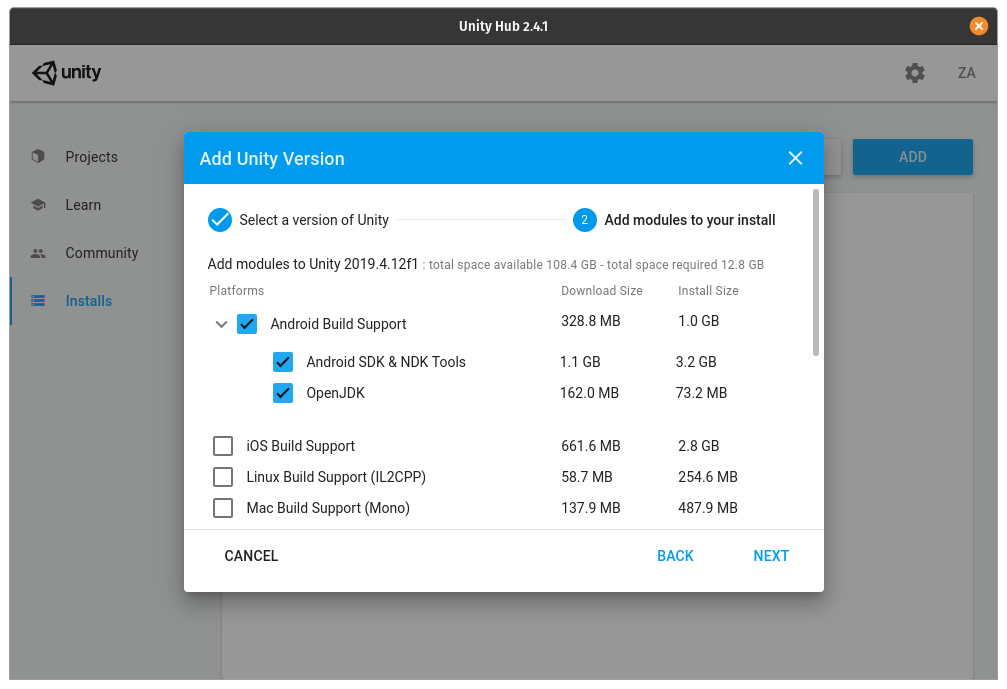
- Click next and wait for the unity version to finish downloading
Setup The project and import our packages
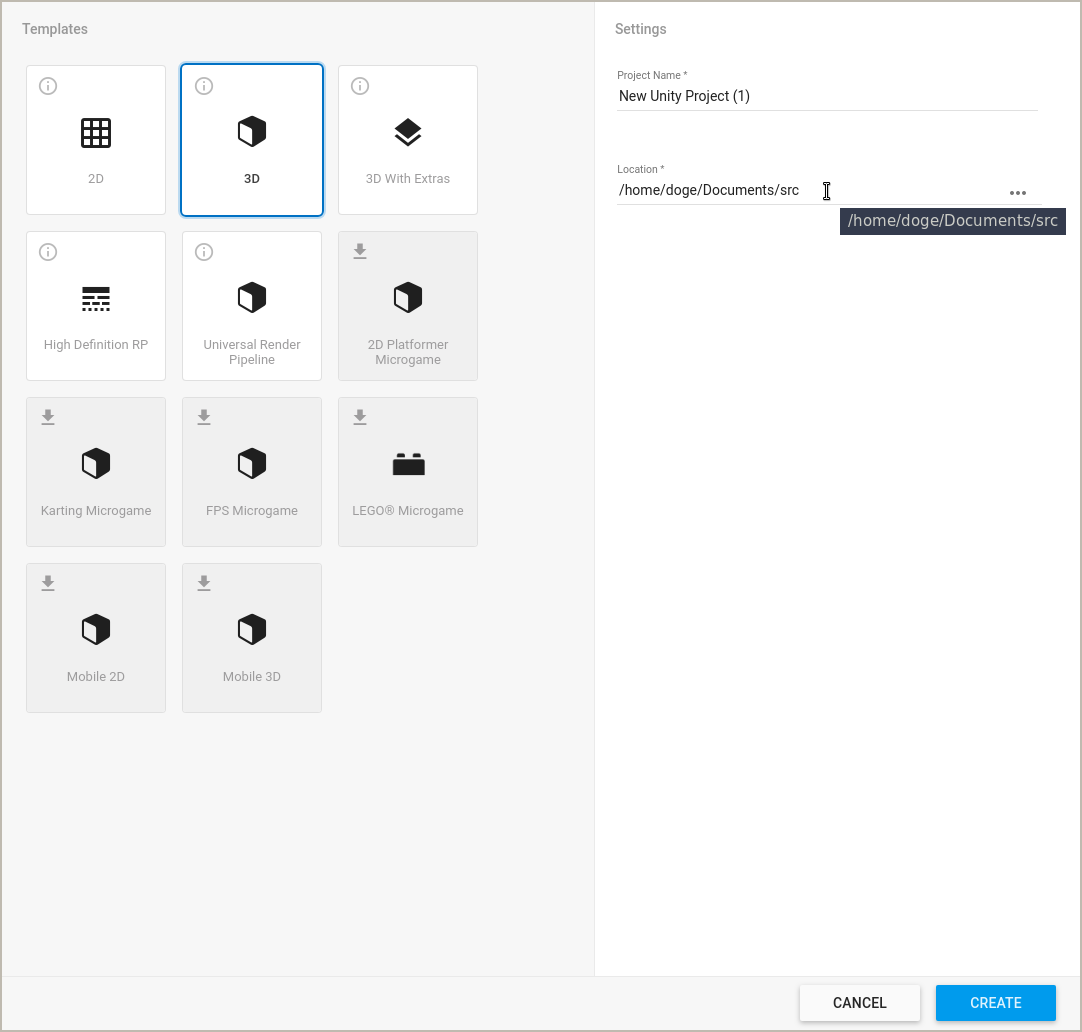
- In Unity Hub
- Go to Projects
- Click new project
- Select 3D as the template and put it in a folder of your choice
- NOT IN THE GIT REPO FOLDER
- Click Create and wait for unity editor to load
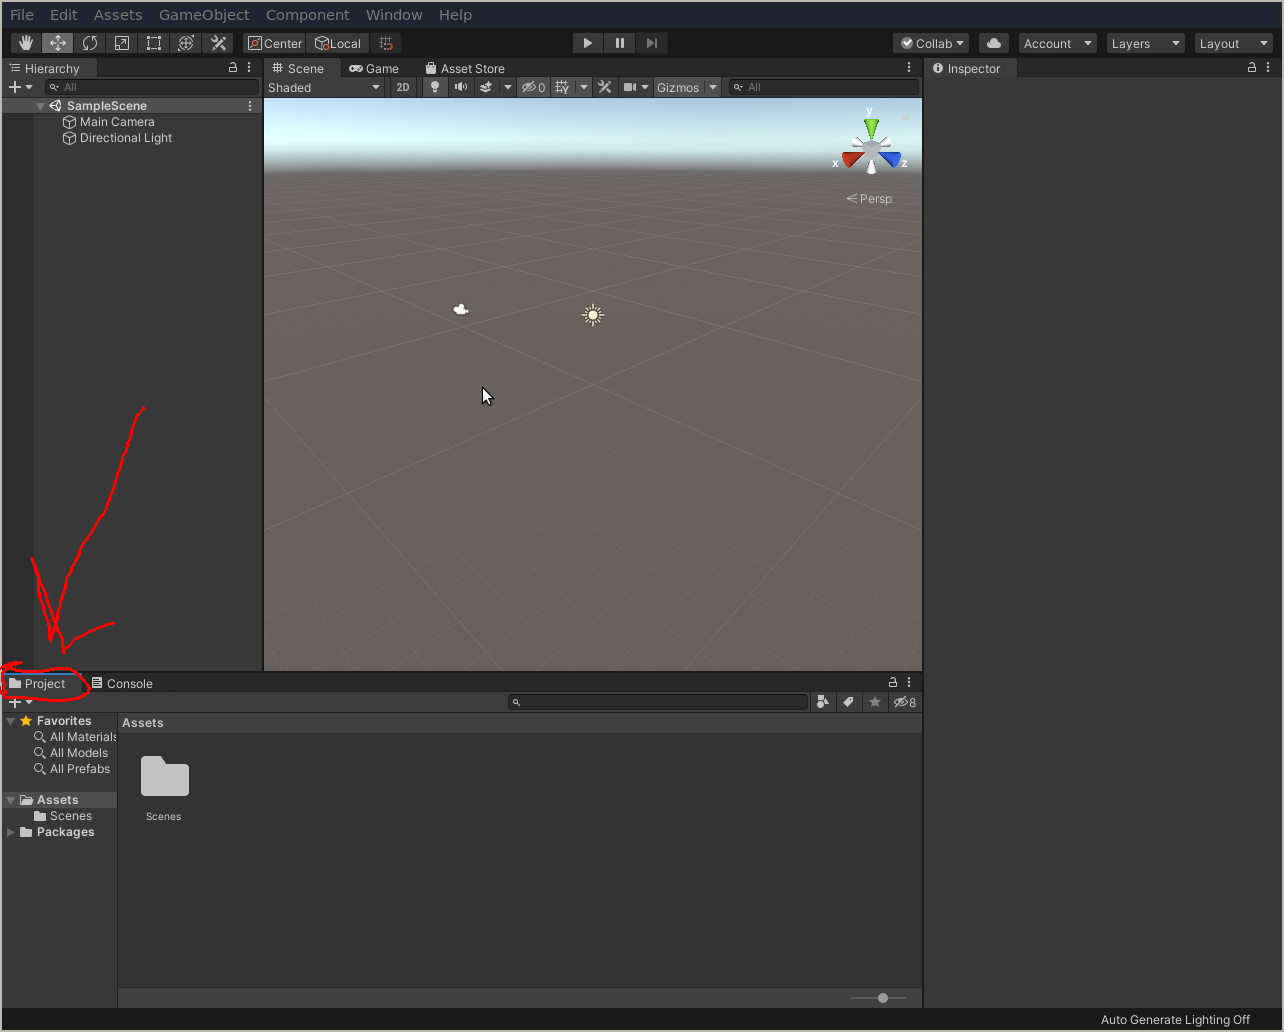
- Once Unity is loaded
- Make sure the “Projects” tab is selected in the bottom left
Load our packages into the editor
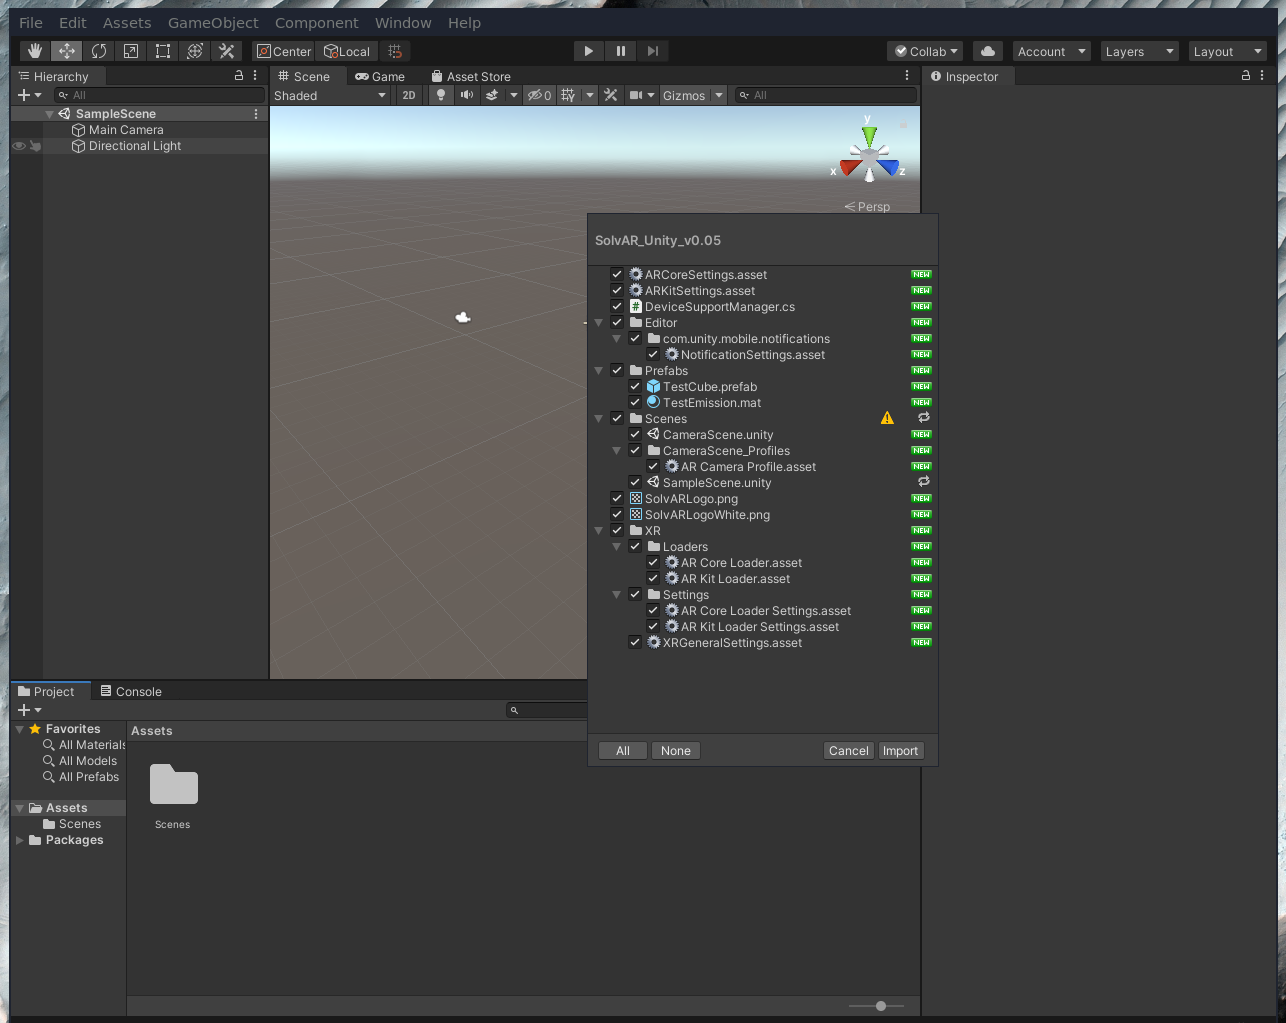
- Find the file in our main git repo called SolvAR_Unity_v0.05.unitypackage
- This contains the code and assets for our project.
- As of writing this it is located in SolvAR/Working_Packages/SolvAR_Unity_v0.05.unitypackage
- When you find the file open it in a separate file browser and drag the file from the file browser into the blank space under the Assets folder.
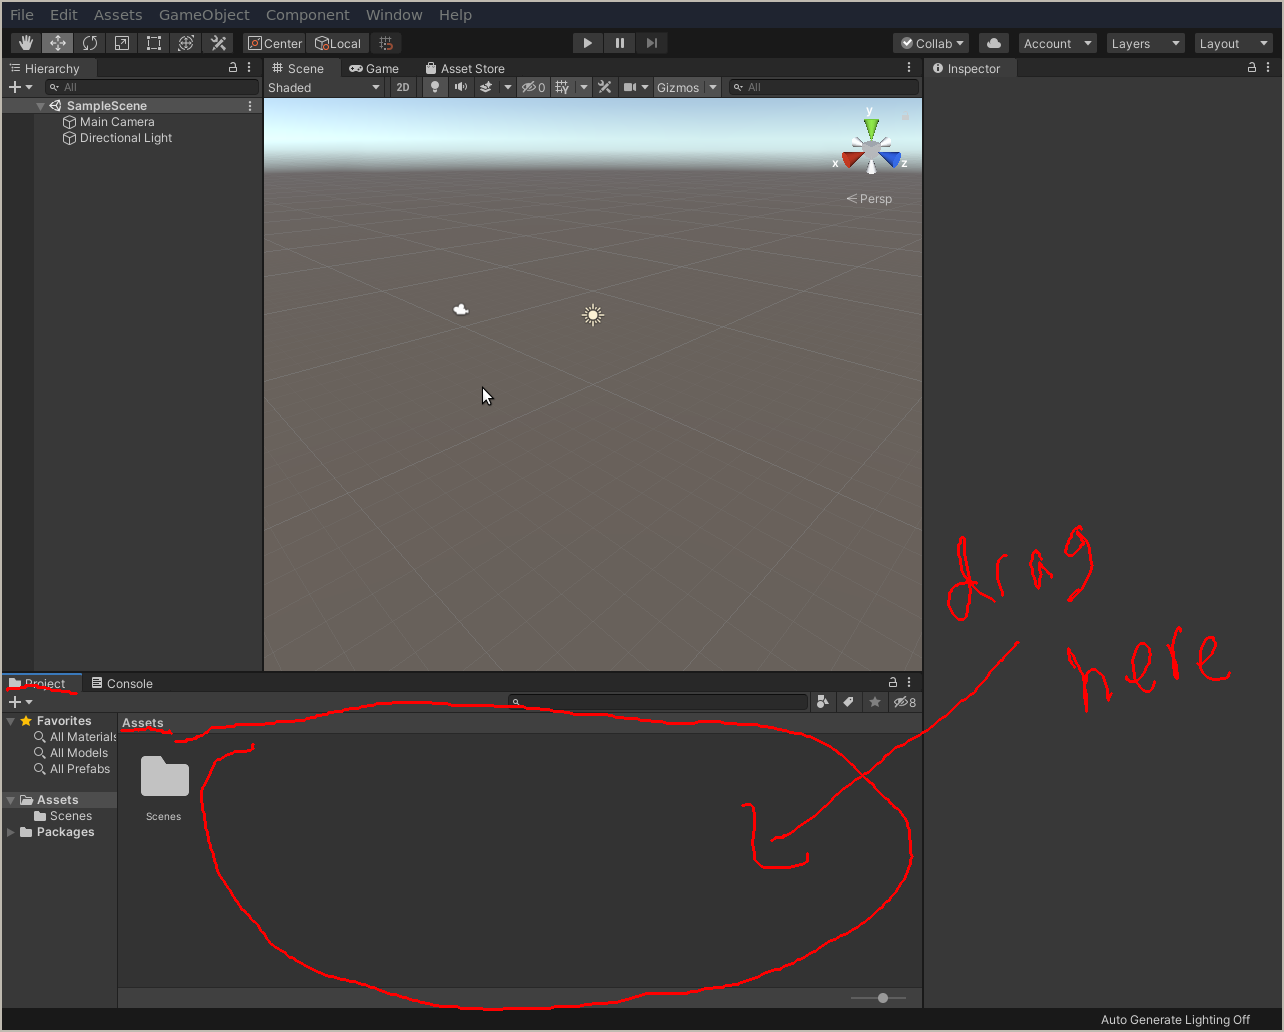
- This will open a dialog to import the package
- Click “Import” and wait till finished.
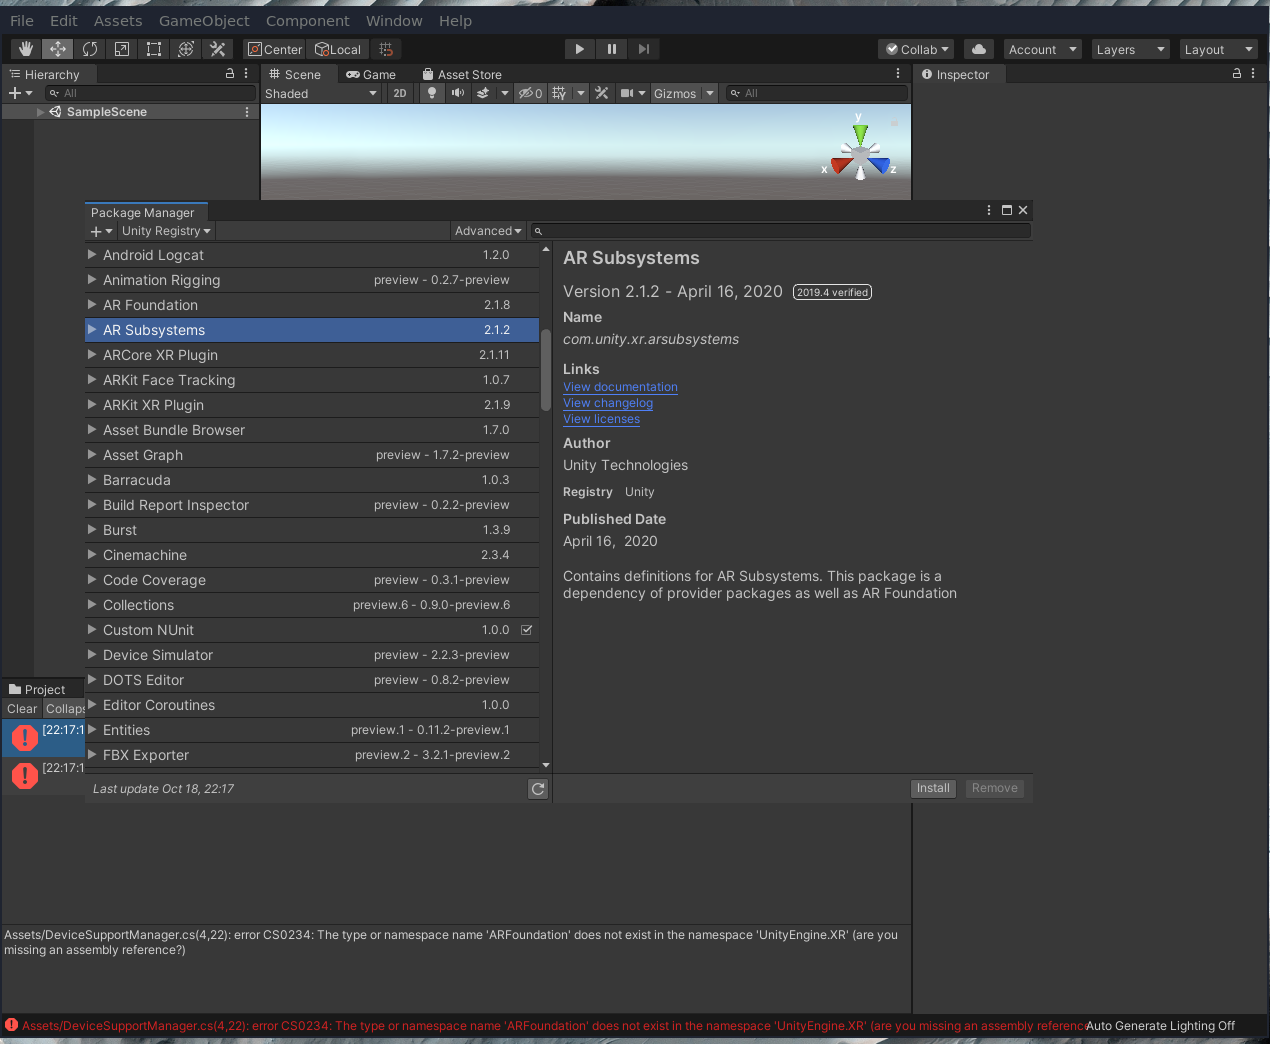
- Once imported you may encounter errors about missing packages.
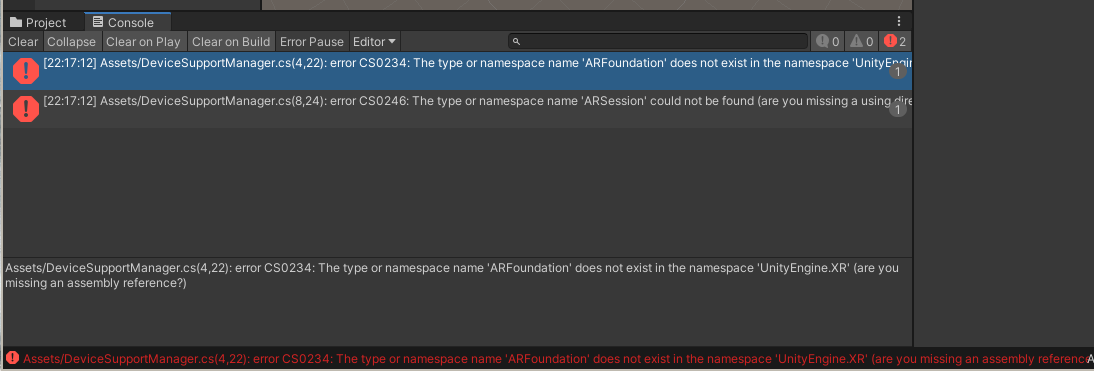
- To fix this go Window > Package Manager
- Wait for all the packages to finish loading.
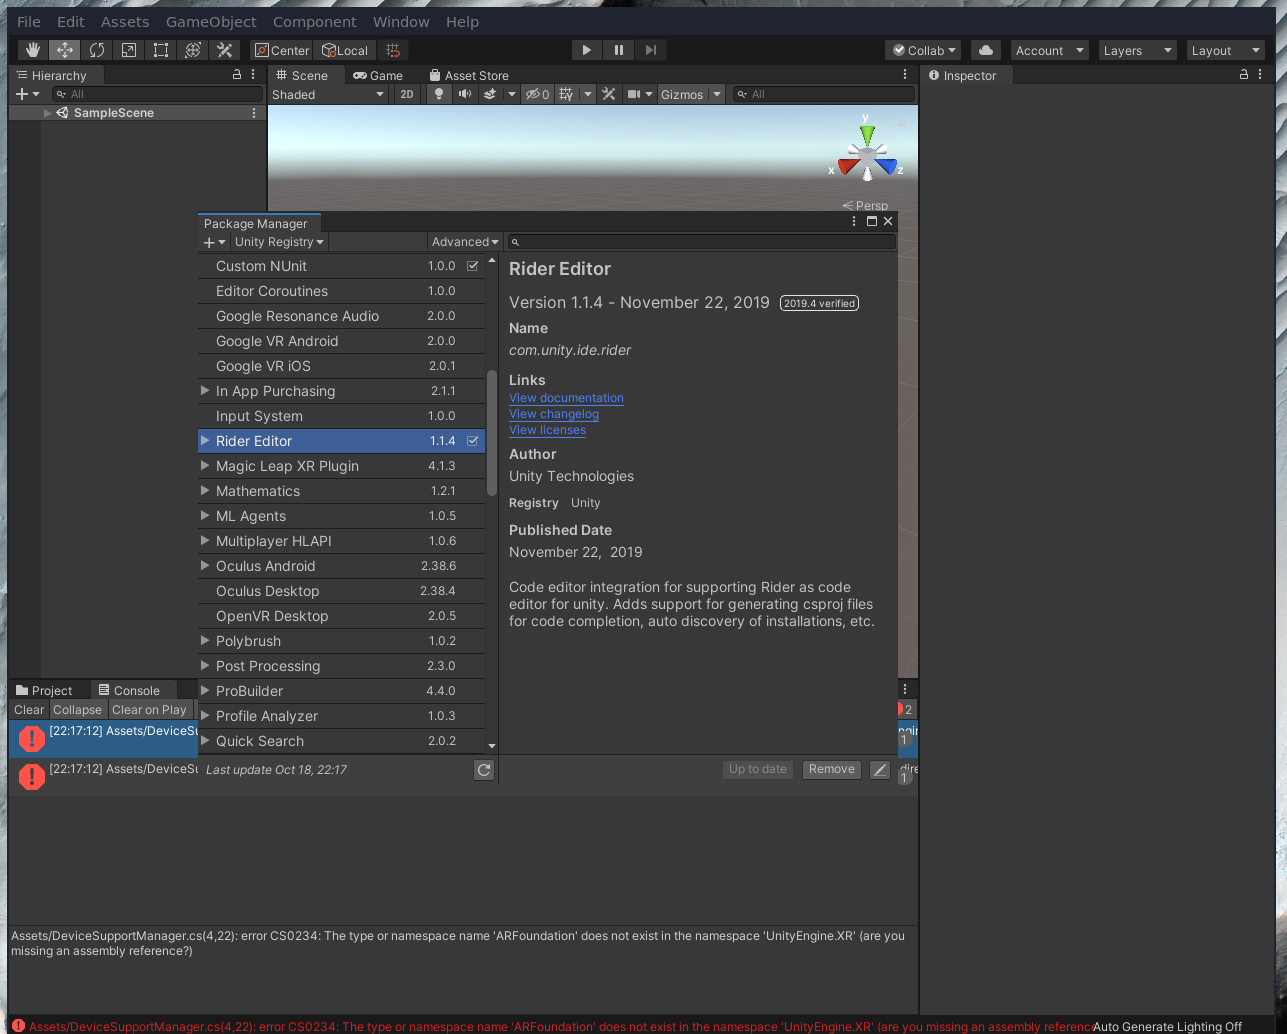
- Select Advanced (top leftish)
- Select “Show Preview Packages” and confirm
- Wait for them to reload
- Look for the ARFoundation and ARSubsystems packages
- Install each of them and wait till finished
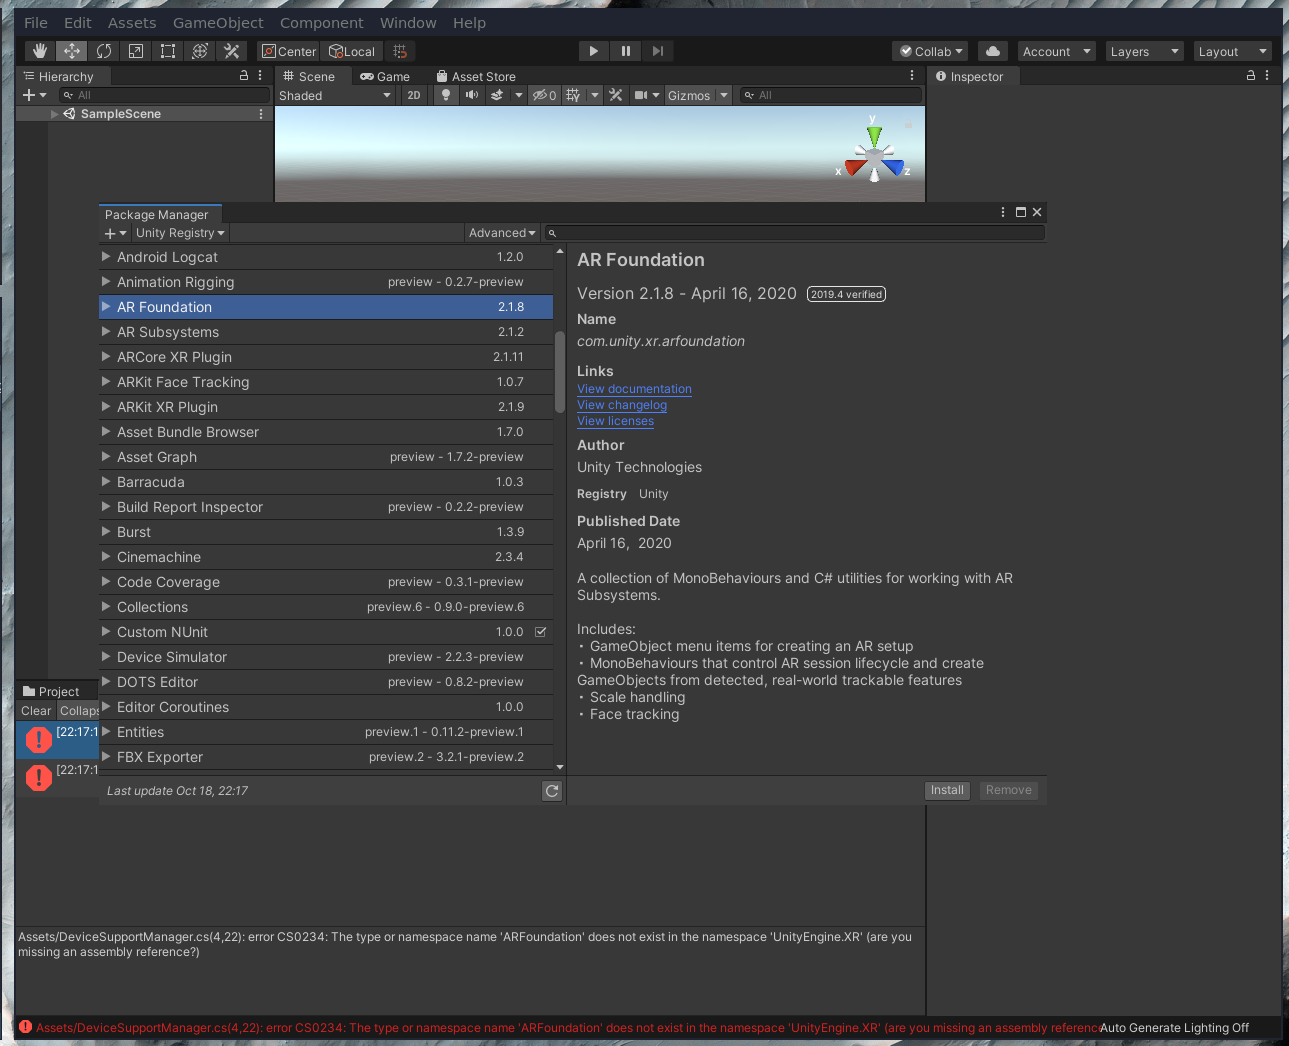
- Exit package manager.
- Now the errors should be gone and left with benign warnings in yellow instead of red